Member-only story
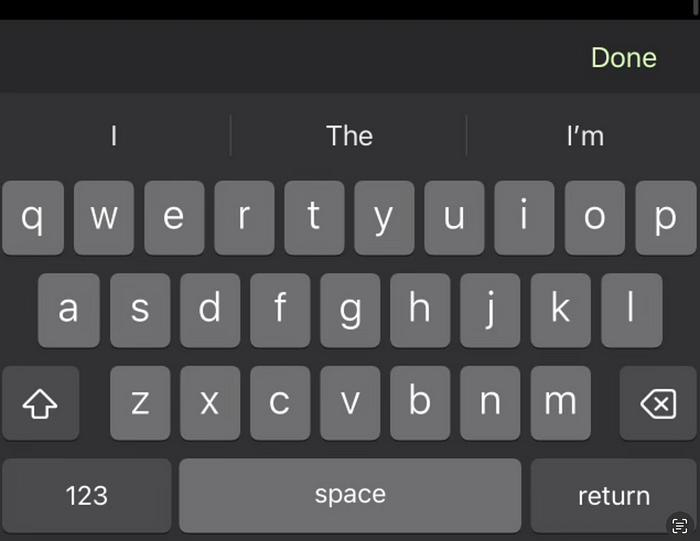
This tutorial shows you how to create a ‘Done’ button that will display across the top of a SwiftUI keyboard so that users are able to manually dismiss the keyboard.
This is necessary to add on a number keypad as it doesn’t currently come with any built in way to dismiss it. On a regular keypad, users can press return to dismiss the keypad, however it creates a great experience to also give them a way to manually dismiss it.
TUTORIAL
- Add a
@FocusStatevariable to your view. For example@FocusState private var keyboardFocused: Bool. - On to your TextField within the view, add a .focused modifier that is bound to the
keyboardFocusedvariable you created. eg
TextField(“Enter text”, text: $textInput) .focused($isTextFieldFocused)
3. On the view displaying the keyboard, add a toolbar with a toolbarItemGroup with placement of .keyboard and a button that will set the keyboardFocused state to false. eg
.toolbar {
        ToolbarItemGroup(placement: .keyboard) {
            // the Spacer will push the Done button to the far right of the keyboard as pictured.
            Spacer()

            Button(action: {
                keyboardFocused = false
            }, label: {
                Text("Done")…


